Index
- Introduction
- Products Affected
- Contents
- Initial information and preparation
- Mounting
- Dismantling
- Optimal tensioning conditions
- Maintenance
- Troubleshooting
- Common Errors
1. Introduction
Chains in the Snowplough category are the ideal companions for trucks and tractors engaged in snow clearing services and include all the features that professionals look for during such activities, from the lightest to the most intensive.
König chains in the snowplough category are available for trucks, wheel loaders and tractors of all sizes such as Mercedes Benz Unimog, New Holland tractors, Jhon Deere, Same, Kubota...etc.
The purpose of this article is to provide you with more information and assistance regarding the use of König snow chains in the category Snowploughs.
2. Products
| König DR Light | König DR | König Impact |
| König DRS | König Super Impact |
The products covered in this in-depth study are König DR Light, König DR, König DRS, König Impact, König Super Impact
3. Content
- Depending on weight and dimensions, the chains are packed in:
- Sack (1 or ½ pair of chains per sack)
- Cartonbox
- Wooden crate
- 1 bag including
- 1 instruction booklet + 1 steel chain/cable for assembly
- 1 repair link kit
- 1 tensioning shackle kit
4. Initial information and preparation
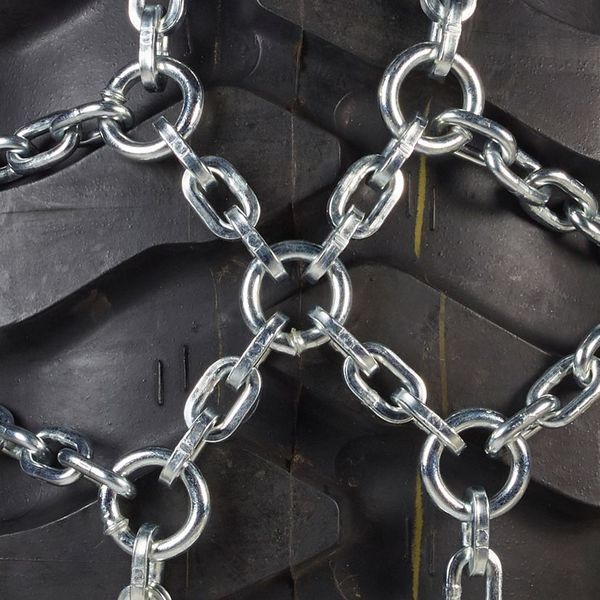
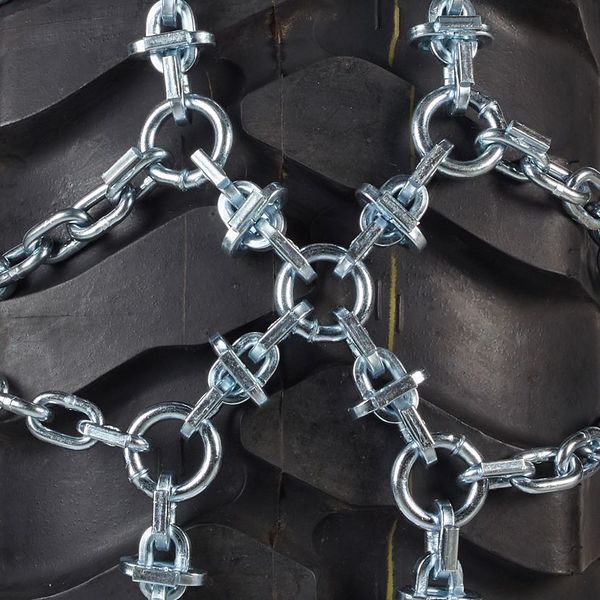
König snowplough chains are characterised by their traditional heavy duty, 100% steel construction which makes the product reliable even in the most extreme conditions and not only during the winter months but also offer excellent traction even on slippery muddy terrain.
Let's take a look at their main features.
1. Thickness of the Link Wire
König Professional snow chains in the Snowplough segment are produced with different wire diameters (thinner links for more compact vehicles, smaller tyres or space constraints, thicker links for larger vehicles and tyres and for more severe conditions), which means they can better suit tyres with any type of tread (road, mud and snow, agricultural etc).
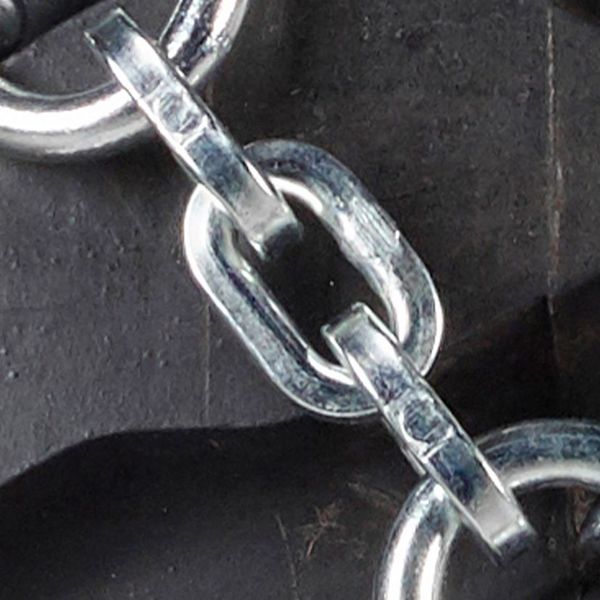
The D-shaped chain link profile represents the best compromise between performance and smoothness of the links.
The threads available for the various models in the category are: 4.50mm, 5.50mm, 7.00mm, 8.00mm and 10.00mm, each specific to the chain/application size selected.
2. Tread Link Reinforcement Technologies
König Professional snow chains in the Snowplough-Tractor segment offer different types and tread technologies to suit every type of use: from the least intensive to the most extreme.
Let's see what they are:
Simple link tread: makes the chain lighter and easier to handle
 |
 |
The snow chain model with plain mesh tread is: König DR Light.
Tread with ice-breaker reinforcement: ideal for winter services
 |
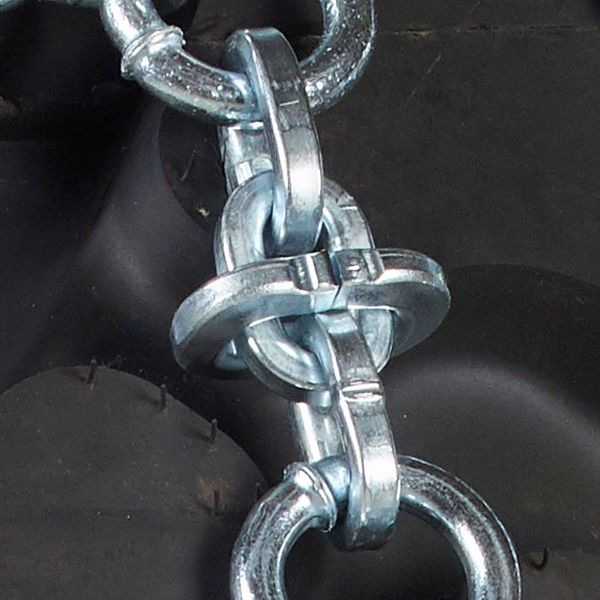 |
The tread with reinforcements on the horizontal links offers excellent traction and an incremental utilisation volume of 50%.
The snow chain models with ice-breaker tread reinforcements are: König DR and König DRS.
Tread pattern with ice-breaker reinforcement and welded wear bars: ideal for intensive winter service
 |
 |
The tread with ice-breaker reinforcements and welded wear bars, which are applied to both the reinforcements and the vertical links, ensure maximum grip and a 100% incremental usage volume.
The snow chain models with ice-breaker reinforcements and welded wear bars are: König Impact and König Super Impact.
3. Tread types and designs
Double diamond: represents the tread design standard for snowplough chains and doubles the amount of traction elements of a classic truck chain
The snow chain models with double diamond treads are: König DR Light, König DR, König Impact.
Triple Diamond: Only available for wide-section tyres and adds an additional unit to the double diamond tread.
The snow chain model with triple rhomboid tread is: König DRS.
Net: offers the ultimate in performance and wear resistance
The snow chain model with mesh tread is: König Super Impact.
König Professional snow chains in the Snowplough-Tractor category are not only intended for use on snowy and icy terrain. They also offer superior performance in muddy conditions and on low-grip terrain.
The snow chains discussed in this article are certified according to Ö-Norm V5119, thus fulfilling all legal requirements.
5. Mounting
König Professional's range of snow chains in the tractor category not only offers chains with multiple thickness wire links but also covers a very wide range of tyres.
Depending on the weight and size of the chain, there are two methods of positioning the chain on the wheel, which we explain below.
|
Fast positioning without rope Recommended for light chains |
Chain positioning with rope Recommended for heavy handling chains |
|
|
|
|
First, remove the chain from the packaging and lay it out in front of the wheel of your vehicle, making sure it has no knots. If you find them, untie them so that the chain is presented in an orderly manner.
|
First, remove the chain from the packaging and lay it on the side of the wheel of your vehicle, making sure it has no knots. If you find them, untie them so that the chain presents itself in an orderly manner.
|
|
|
|
|
Now lift the chain by grabbing it from the inner side chain and push the latter behind the wheel. |
Once the mounting rope is attached, proceed slowly with the vehicle by one wheel revolution so that the chain is evenly spread over it.
|
Now it is time to attach the chain.
To make this operation easier, we recommend that you position the chain so that both ends have play and are free of the tyre. This will make it easier for you to hook the chain on.
Once the chain is evenly positioned on the tyre, you can attach the chain in the following order:.
1. First connect the inner part of the wheel, hooking the locking hook to the link or ring (varies according to the chain model). Now connect the central part of the wheel, hooking the locking hook to the link or ring (varies according to the chain model).
3. Finally, connect the outer part of the wheel, hooking the locking hook to the link or ring (varies according to the chain model).
Caution: once the chain is hooked on, check that the rhomboid groups have no knots and that the links are not twisted on themselves. If you find either of these conditions, unhook the ends and position the chain correctly before hooking it up again.
You may now proceed to tension the chain.
A. B.
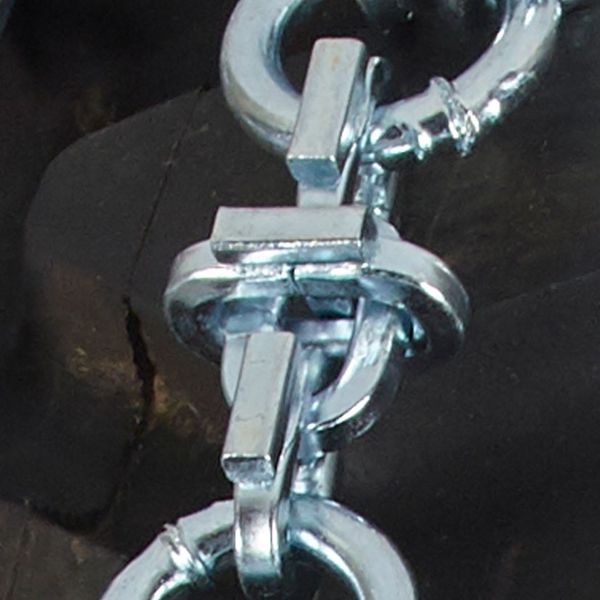
Pull the tensioning chain (sidewall puller) by sliding it inside the rings, insert the tensioning lever into the nearest link, rotate the lever to apply tension and secure the lever in the tensioning ring (A).
Wrap the excess tensioning chain around the chain puller itself, so that it does not come into contact with the rim when the vehicle is in motion, now attach the spring-loaded end hook to one of the nearest links of the chain (B).
At this stage we recommend that you do not overtighten the chain: in fact, the chain should not be too tight during the first few metres of driving, so that it is evenly distributed over the tyre surface. Bear in mind that at this point in the assembly process, some of the chain assemblies are clamped under the wheel and the weight of the vehicle and therefore the chain is not yet correctly positioned on the tyre.
Now proceed with the vehicle and drive a short distance at low speed. Stop to retension the chains.
Release the spring-loaded end, unwind the excess tensioning chain, release the lever and release the tensioning chain.
Now pull the tensioning chain tightly and engage the lever, inserting it into the nearest link and hooking the tensioning lever into the tensioning ring.
Wrap the redundant part of the tensioning chain around the chain puller itself, so that it does not come into contact with the rim while the vehicle is in motion, hooking the spring-loaded end hook into one of the nearest links of the chain.
You are done. Now the two chains are fitted and tensioned, you are ready to go.
6. Dismounting
All it takes to remove your König Snowplough snow chain is a few simple steps:
Unhook the spring-loaded end hook from the chain and unravel the excess links of the tensioning chain.
Unhook the tensioning lever and pull it away from the link, release the tensioning chain from the tension and make the chain soft on the tyre by pulling it towards you.
Now, on the inner side, release the hook from the link or ring and repeat the step by releasing the hook from the side chain link or ring on the outer side.
Pull the upper part of the chain off the wheel by placing it on the ground.
You are now finished, the chain is completely disassembled: to free it from under the wheel, move the vehicle just enough.
7. Fitting the Professional chains to the tyres
It is recommended to carry out the fitting test to check that the chain fits correctly on the tyre before its actual use.
Experienced Professional chain users in Italy always recommend fitting the chain ‘with the belly’. The belly defines the free space between the chain and the tyre that indicates a correct tensioning procedure.
Leaving the chain ‘belly’ brings two main advantages:
- Performance: the belly causes the chain to drop to the ground, before the tyre touches the ground, significantly increasing the contact surface, providing more links in contact with the ground;.
- Durability: the belly guarantees a certain independence of movement between wheel and chain, ensuring that the links can move and that it is not just a few links that work in contact with the ground.
8. Maintenance
Cleaning and storage
Once the chains have been used, please wash them with lukewarm water before storing them permanently in the packaging, to remove dirt and any debris or chemical agents left on the chain. In case of persistent dirt you can use a brush with semi-rigid bristles.
Please allow them to dry completely, if necessary removing any residual water and moisture present with a cloth.
Once dry, the chains can be placed back in the packaging, ready for the next use.
Checking wear
Washing the chain will also allow you to check the wear status of the chain components, and be sure that the chain will be ready for the next use.
Important: If you use your chains continuously and intensively, we recommend that you check the wear of your chains periodically during the season.
When approx. 30 per cent of the cross section of the chain wire is worn on one side, it is recommended to turn the chains, in this way the chain will work on the wire of the opposite side of the link and/or wear bar, doubling its service life.
For this reason, it is important to turn the snow chains on the wheels after having driven some kilometres and after having checked the wear condition of the tread links.
Let us see together how to turn the chains:
A. Snow chains with simple and/or reinforced tread links
We refer to the snow chain models with single tread: König DR Light and the snow chains with tread with ice-breaker reinforcement: König DR and König DRS
The chain mounted on the driver's side wheel (A) must be fitted to the passenger's side wheel (B) and vice versa, by rotating the chain along the longitudinal axis as in the picture.
B. Chains with ice-breaker treads and welded-on wear bars
The snow chain models with treads with ice-breaker reinforcements and welded-on wear bars are: König Impact and König Super Impact
The chain mounted on the driver's side wheel (A) must be mounted on the passenger side wheel (B) and vice versa, reversing the direction of rotation and contact of the chain as in the picture.
9. Troubleshooting
Tangled chain
When the chain is fitted with knots or with some components that are tangled or stuck together, it will tend to be short. In fact, you will find it difficult to engage the various components.
Please remove the chain from the wheel and free any knots or components that have become entangled with each other.
If there are any knots, please focus on their position and free them before refitting the chain. Once installed, further check that there are no knots or chain links subject to abnormal twisting. Should you find any, disassemble the chain and fix them before reassembling the chain.
Caution: the knotted or tangled part of the chain makes assembly more difficult, but not only that: it also influences the static dimensions of the chain on the tyre, increasing its thickness. This means that, when the vehicle is in motion, the chain can collide with parts of the wheel arch and assume unpredictable behaviour with the risk of damage.
Chain/wheel compatibility problems: Chain that looks too big
If your Professional snow chain from the Snowplough category is too big, you will tend to have a very generous fit, which will make installation very easy. You will be able to hook the two ends together easily, but once installed, the chain will not tension properly. You can tell this from the chain puller that closes almost completely towards the centre of the rim and from most rhomboid groups that remain very loose even when the chain is fully tensioned.
If you use the chain in these conditions, it could have an abnormal dynamic lift, which could create interference with wheel arch components or even slip off the tyre.
Some of the causes that can cause the chain to be large are:
Tyre wear
A worn tyre has less development than a brand new tyre. In some cases even tensioning the chain to the maximum is not sufficient to obtain a satisfactory fit on the tyre, the chain remains loose.
Tyre make and model
Some tyres of certain makes and models (e.g. Continental/Mitas AC85 in size 420/85-30) have greater chain development than all other makes and models (of size 420/85R30) included in the König standard size (size 3305), such that a larger chain size (size 3352) is required than the standard.
The physical dimensions/volume of the tyre do not correspond to the theoretical ones
i.e. your tyre in terms of snow chain compatibility is considered ‘non-standard’ or more technically oversized. This means that your tyre has a smaller development than the standard and requires a smaller chain.
Your tyre will therefore require a smaller Professional snow chain in the Truck category, which therefore covers a smaller tyre size range.
In this case, please get in touch with one of our Product Specialists who will assist you in determining the correct size for your tyre. You can write to us at: Customer Service.
Chain/wheel compatibility problems: Chain that looks too small
A Professional snow plough chain that is too narrow negatively affects the installation process: at best it makes it difficult, but it may make it impossible. It all depends on how small the chain is in relation to the tyre.
A small snowplough chain makes it difficult, if not impossible, to attach the various elements at both ends, and when fitted, the chain is too tight on the wheel and the side elements that should normally be positioned on the tyre shoulder end up being on the tread.
In such cases, the first thing to do is to dismantle the chain and check that no knots are present and that the components are free to move.
Some of the causes that can lead to the chain being small are:
Tyre profile
Bear in mind that there are various tyre profiles for agricultural vehicles, ranging from those with a herringbone tread (agricultural profile) to Multi Porpose Tyres (MPT tyres) and finally, trailer tyres (High Flotation) and Mud and Snow tyres. This difference in tread geometry can affect the fit of the chain on the tyre, making it difficult or even impossible to fit.
Tyre make and model
Some tyres of certain makes and models (e.g. Continental in size 7.50R18) have a smaller chain size than all other makes and models (in size 7.50R18) included in the König standard size (size 3004), such that a smaller chain size (size 0305) than the standard is required.
Your tyre will therefore require a larger Professional snow chain, which covers a larger tyre size range.
In this case we invite you to get in touch with one of our Product Specialists who will assist you in determining the correct size for your tyre. You can write to us at: Customer Service.
9. Common Errors
In this session we point out the assembly errors we find most frequently from customers.
Chain that looks too big
It is common for users to doubt that the chain is too big for their wheel when they are hooking the two ends of the chain onto the tyre tread, and the chain assemblies remain very soft on the tyre even after tensioning the chain with the tyre tensioner.
Now let's see how we can best fit the chain to your wheel
Drive your vehicle at very low speed for a few metres so that the chain has a chance to position itself and balance correctly on the tyre.
Stop, unhook the spring-loaded end, unravel the excess part of the chain and release the chain tensioning lever.
Now pull the tensioning chain vigorously and hook the tensioning lever into the nearest link and engage the lever in the ring.
Wrap the surplus part of the tensioning chain around the chain puller itself, so that it does not come into contact with the rim when the vehicle is in motion, by hooking the spring-loaded end hook into one of the nearest links of the chain.
You are done. Now the two chains are fitted and tensioned, you are ready to go.
Attention: As König Professional snow chains are made entirely of steel and designed to withstand the most extreme conditions, they are not equipped with any automatic micro-tensioning device. We ask you to take into consideration that the combination of the variety of tyre geometries and tyre treads on the market, the weight and size of the chain and its links, may make a second stop necessary to re-tension the chain.
If even after the re-tensioning your chain is still large and it is not possible to tension it any further, it may be that your wheel has a different size than the standard fit of the König snow chain.
In this case we invite you to get in touch with one of our Product Specialists who will assist you in determining the correct size for your wheel. You can write to us at: Customer Service.
Chain that looks too small/tight
It is easy to determine when a flexible cable chain appears to be too narrow:
- If it is impossible or difficult to attach the various elements
- If it is fitted, the chain feels too tight on the wheel: the side elements that should normally be positioned on the tyre shoulder end up on the tread;
The first thing to do is to remove the chain and check that there are no knots and that the components are free to move.
Once this check has been made, proceed with assembly again.
If even after adjustment your chain is still small and it is not possible to fit it properly, it may be that your wheel has a different size than the standard fit of the König snow chain.
In this case we invite you to get in touch with one of our Product Specialists who will assist you in determining the correct size for your wheel. You can write to us at: Customer Service.